Plan Your Project With A Free Consultation
A well-designed deck can transform your backyard into a functional and inviting outdoor space. If you’ve ever wondered how to build a deck, this comprehensive guide will walk you through every stage of deck building, from planning and design to choosing materials, gathering tools, and completing the construction process. Whether you’re a seasoned DIY enthusiast or a homeowner taking on your first project, following these steps ensures a durable, safe, and visually appealing deck.
Why Building a Deck Matters
A deck adds more than just extra space. It enhances your home’s value, creates an area for entertaining, and provides a comfortable outdoor retreat. Proper deck building ensures the structure is safe, long-lasting, and suited to your lifestyle. Poor planning or construction, on the other hand, can lead to structural problems, water damage, or safety hazards.
Some benefits of a well-built deck include:
- Expanding usable living space
- Increasing property value
- Providing an area for gatherings and relaxation
- Enhancing outdoor aesthetics
- Supporting outdoor furniture, grills, and plants
Step 1: Planning Your Deck
The first step in building a deck is careful planning. This involves determining the size, location, design, and purpose of your deck. Consider the following:
- Location: Choose a spot with good sun exposure, convenient access, and proper drainage.
- Size: Determine how many people you want to accommodate and what furniture or features you want.
- Style: Decide between a raised deck, ground-level deck, multi-level design, or wrap-around deck.
- Local Regulations: Check building codes, permits, and HOA rules.
- Budget: Estimate costs for materials, tools, and any professional help needed.
Planning helps prevent costly mistakes and ensures the deck meets your needs.
Step 2: Choose the Right Materials
Selecting the right materials is a crucial part of deck building. Common options include:
- Pressure-Treated Lumber: Affordable, durable, and resistant to rot.
- Cedar or Redwood: Naturally resistant to decay and insects, with a rich appearance.
- Composite Decking: Low maintenance, durable, and available in various colors.
- PVC or Vinyl: Weather-resistant and very low maintenance.
Consider durability, aesthetics, maintenance, and budget when selecting materials. Also, don’t forget fasteners, screws, and joist hangers compatible with your chosen material.
Step 3: Gather Tools and Equipment
Having the proper tools makes building a deck easier and safer. Essential tools include:
- Tape measure and square
- Circular saw or miter saw
- Power drill and bits
- Level and string line
- Shovel and post hole digger
- Hammer and nails or screws
- Safety glasses, gloves, and ear protection
Optional tools for efficiency:
- Decking jig for precise cuts
- Concrete mixer for post footings
- Post level for vertical accuracy
Step 4: Prepare the Site
Proper site preparation is a key deck building tip. Steps include:
- Clear vegetation, rocks, or debris from the area
- Measure and mark the deck’s outline
- Dig post holes according to your design and local building codes
- Add gravel to the base for drainage
- Set up temporary string lines for alignment
A well-prepared site ensures a level, stable foundation.
Step 5: Install the Deck Foundation
The foundation is critical for stability. Depending on your deck type, this may involve:
- Concrete Footings: Pour concrete into holes and set posts with anchors.
- Deck Blocks: Precast blocks can be used for ground-level decks.
- Steel Post Anchors: Provide added durability in some designs.
Ensure all posts are level and aligned with your string lines before moving on.
Step 6: Build the Frame
Once the foundation is in place, it’s time to construct the frame. Steps include:
- Attach beams to the posts using joist hangers
- Install joists perpendicular to the beams
- Space joists evenly according to decking material requirements
- Double-check that the frame is level and square
A strong frame is essential for a safe and durable deck.
Step 7: Install Decking Boards
Installing decking boards is the most visible part of deck building. Follow these steps:
- Start at one edge and work across the deck
- Leave small gaps between boards for drainage
- Secure boards with screws or hidden fasteners
- Stagger seams for a natural, stable appearance
- Trim boards at edges for a clean finish
Take your time to ensure straight lines and consistent spacing.
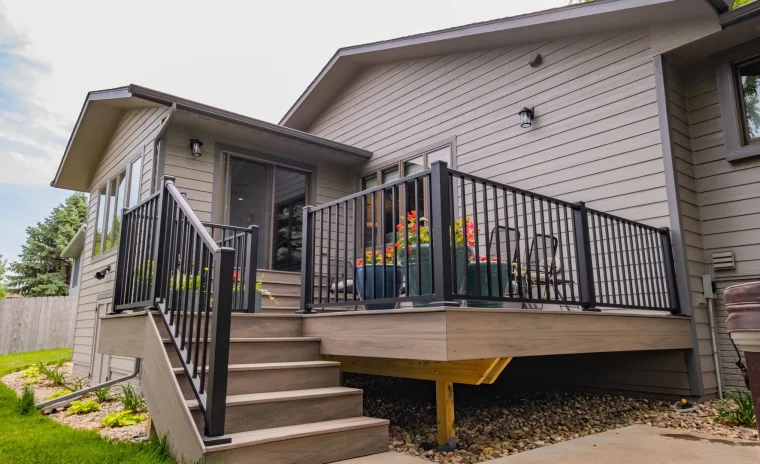
Step 8: Add Railings and Stairs
Safety features are important in building a deck. Railings and stairs should comply with local building codes:
- Railings: Install posts at corners and along edges, then add horizontal or vertical rails
- Stairs: Measure height and depth carefully for even steps
- Use stringers and secure treads properly for stability
Railings not only enhance safety but also add aesthetic appeal.
Step 9: Sanding and Finishing
Finishing your deck ensures durability and comfort:
- Sand rough edges or surfaces to prevent splinters
- Apply stain, paint, or sealant depending on the material
- Allow time for the finish to dry before placing furniture
This step protects your deck from weathering and improves its appearance.
Deck Building Tips for Success
- Always check local building codes before starting
- Measure twice, cut once for accurate results
- Use corrosion-resistant screws and hardware
- Maintain consistent joist spacing for support
- Apply weather-resistant finishes for long-lasting results
- Consider future maintenance when choosing materials
Following these tips makes the deck safer, more durable, and easier to maintain.
Common Mistakes to Avoid
Even experienced DIYers can make errors. Avoid these pitfalls:
- Skipping site preparation
- Using improper fasteners for the material
- Neglecting permits or local regulations
- Ignoring drainage needs
- Not double-checking level and alignment
Careful planning and attention to detail prevent costly repairs later.
DIY vs. Professional Deck Construction
While many homeowners successfully learn how to build a deck, consider professional help if:
- The deck is large or multi-level
- You want complex designs or curves
- You lack experience with concrete or framing
- Local building codes are strict
Professionals ensure compliance, safety, and high-quality results, though DIY construction can save money and offer personal satisfaction.
Final Thoughts
Learning how to build a deck is a rewarding project that adds functional outdoor space and increases your home’s value. From planning and material selection to foundation, framing, decking, and finishing, following a structured deck building guide ensures safe, durable, and visually appealing results.
With the right tools, careful planning, and attention to detail, you can confidently tackle building a deck that becomes the centerpiece of your backyard. Use these expert deck building tips to achieve professional-quality results while enjoying the process of creating your perfect outdoor retreat